Using the BryZar SMTP service is the best option for email delivery. Luckily, it’s very easy to set up and configure with the SocialEngine social networking script. Just follow these simple steps.
Before following the below steps, you'll need to have set up your SMTP service.
What is SMTP for?
SMTP service is for transactional emails from your website. This is the recommended method to send email from a website. At BryZar, we separate this service from your website hosting server in order to:
- Avoid using your server resources to send mail. This helps keep your site fast and also helps to maintain your server IP reputation.
- Avoid being blacklisted by ISPs in case any emails are marked as spam. These days, ISPs are very strict even if email is marked spam by mistake.
- Better delivery. SMTP has a better rate of delivery.
- Faster delivery
- Send hundreds or thousands of emails from your website.
SMTP Setup Steps with SocialEngine
It is best to have two tabs open for these steps. In one tab, be logged in to your SocialEngine admin panel. In the other tab, be logged in to your BryZar client dashboard.
Step One – Get Your SMTP Details
You can get these from your email that was sent when you created the SMTP account but here’s how to get the details in your BryZar client dashboard.
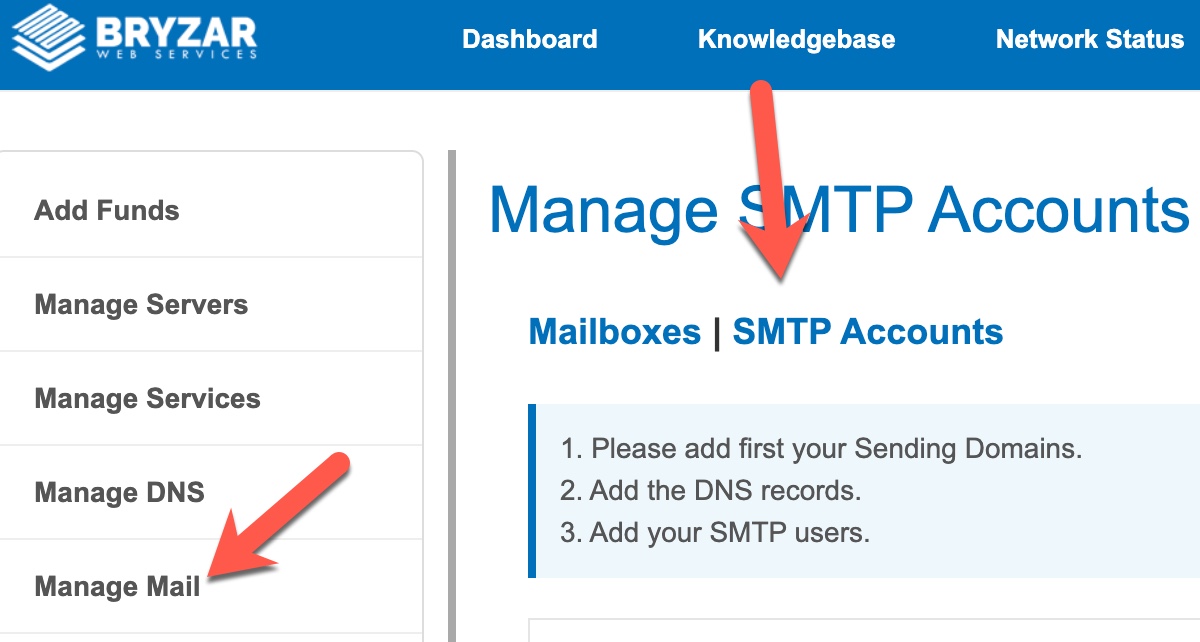
In the BryZar dashboard, navigate to Manage Mail and click SMTP Accounts.
Step Two – SocialEngine Mail Settings
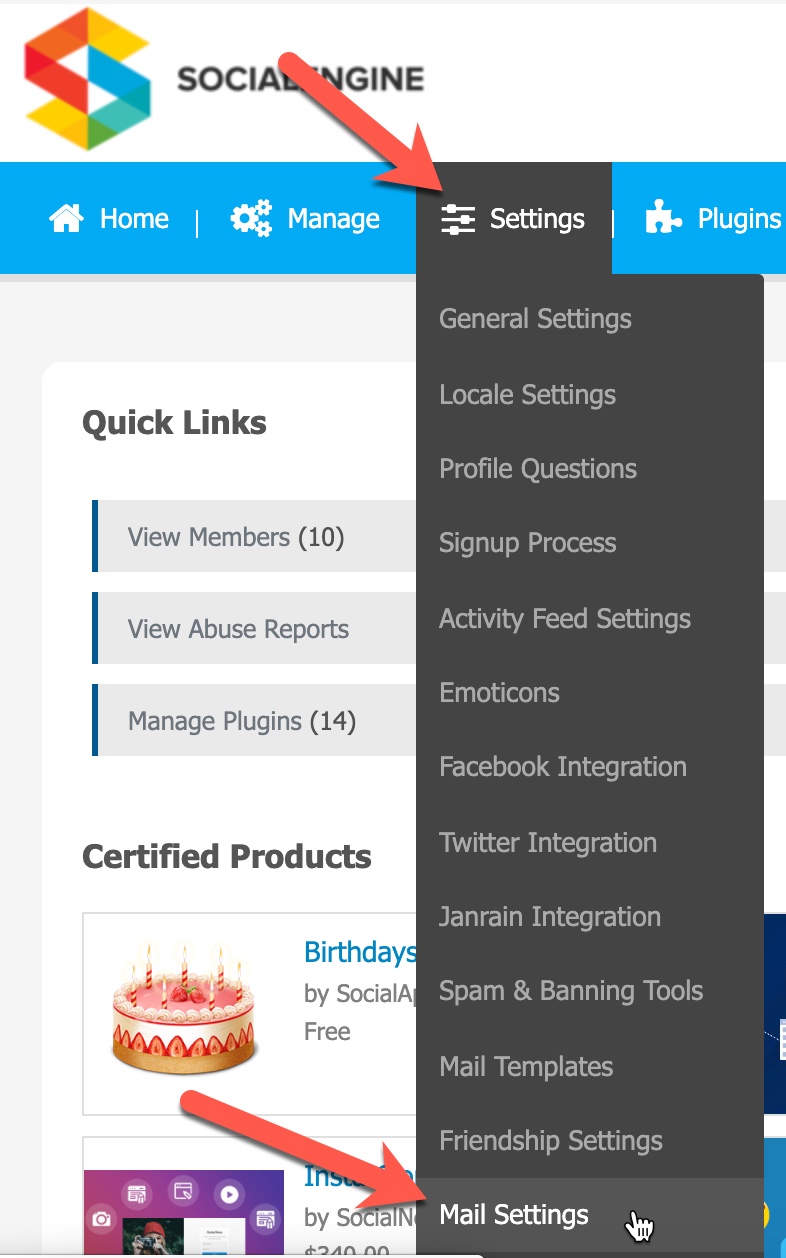
In your SocialEngine admin panel, navigate to Settings > Mail Settings.
Step Three – Enter SMTP Details
I. Scroll down to the setting “Send through SMTP” and select “Send emails through an SMTP server.”

II. Get the SMTP server details from your BryZar dashboard. It’ll be the “Hostname” which in our case would be relay101nyc.networkstead.com
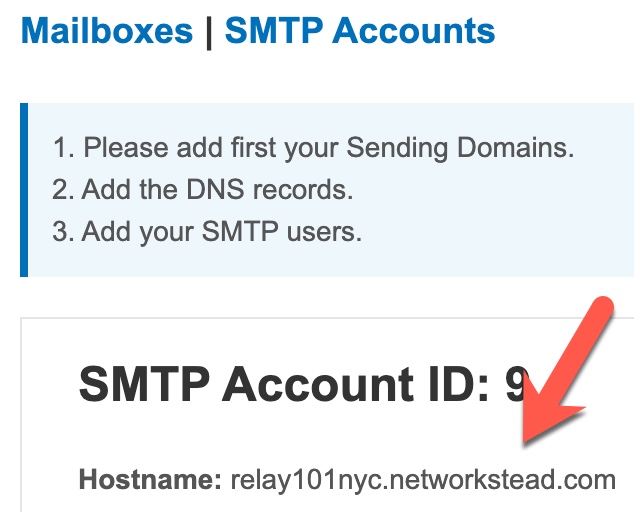
III. Paste that into the “SMTP Server Address” setting in your SocialEngine Admin:

IV. At the bottom of the page in your BryZar dashboard, you can find the port. In our case, it is port 587. This is standard.
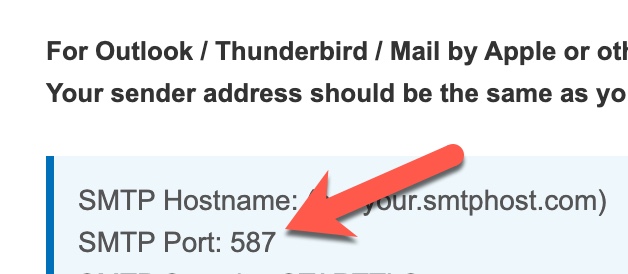
V. In your SocialEngine admin enter 587 for “SMTP Server Port”

VI. For “SMTP Authentication,” choose Yes.

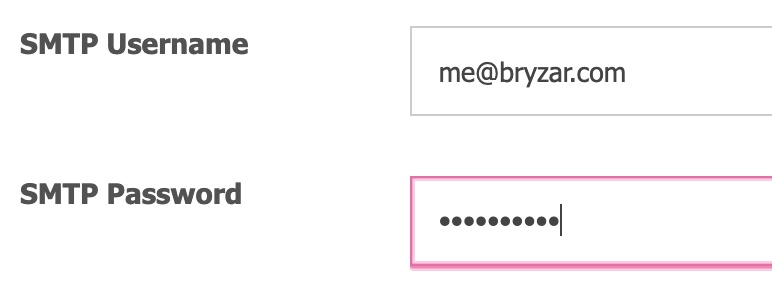
VII. For the SMTP Username and password, enter the details you used when setting up your SMTP service.
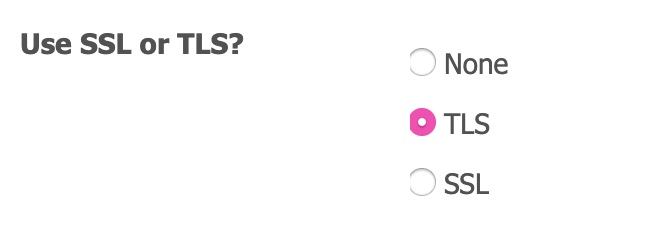
VIII. For the “Use SSL or TLS?” setting, choose “Yes.”
IX. Ensure that your “From Address” email is the same as your SMTP user or your mails will end up in spam and not be received. To see what you have set for the “From Address” scroll up the mail settings page.

Once you save the changes, you’re all set!
